SketchUp
SketchUp is a tool for 3D object modeling and visualization developed by Trimble Inc. It represents popular software for architects, designers, engineers, and artists who need to create and present 3D models.
It offers an intuitive interface and a straightforward modeling process. Its strong point is the ability to quickly create 3D models from basic geometric shapes using tools like line drawing, moving, rotating, or scaling objects. Users can easily create and edit shapes and spatial objects such as buildings, furniture, and similar items.
SketchUp comes with a rich library of predefined models, materials, and textures that facilitate the modeling process. Users can also create their own materials and textures, add lighting and scenes to achieve a more realistic appearance for their models. Additionally, it's possible to import and export models in various formats such as DWG, DXF, OBJ, 3DS, and many others.
Similarly, it offers an extension called LayOut, which allows the creation of professional 2D drawings, plans, views, and presentations from 3D models. LayOut is valuable for project creators and architects who need to generate detailed drawings and documentation for their designs.
Another advantage of SketchUp is its active user community, which shares projects, tips, tricks, and extensions. This community has created a multitude of useful resources such as video tutorials, discussion forums, and online courses that help new users learn SketchUp and progress in their modeling work.
Source: https://www.sketchup.com
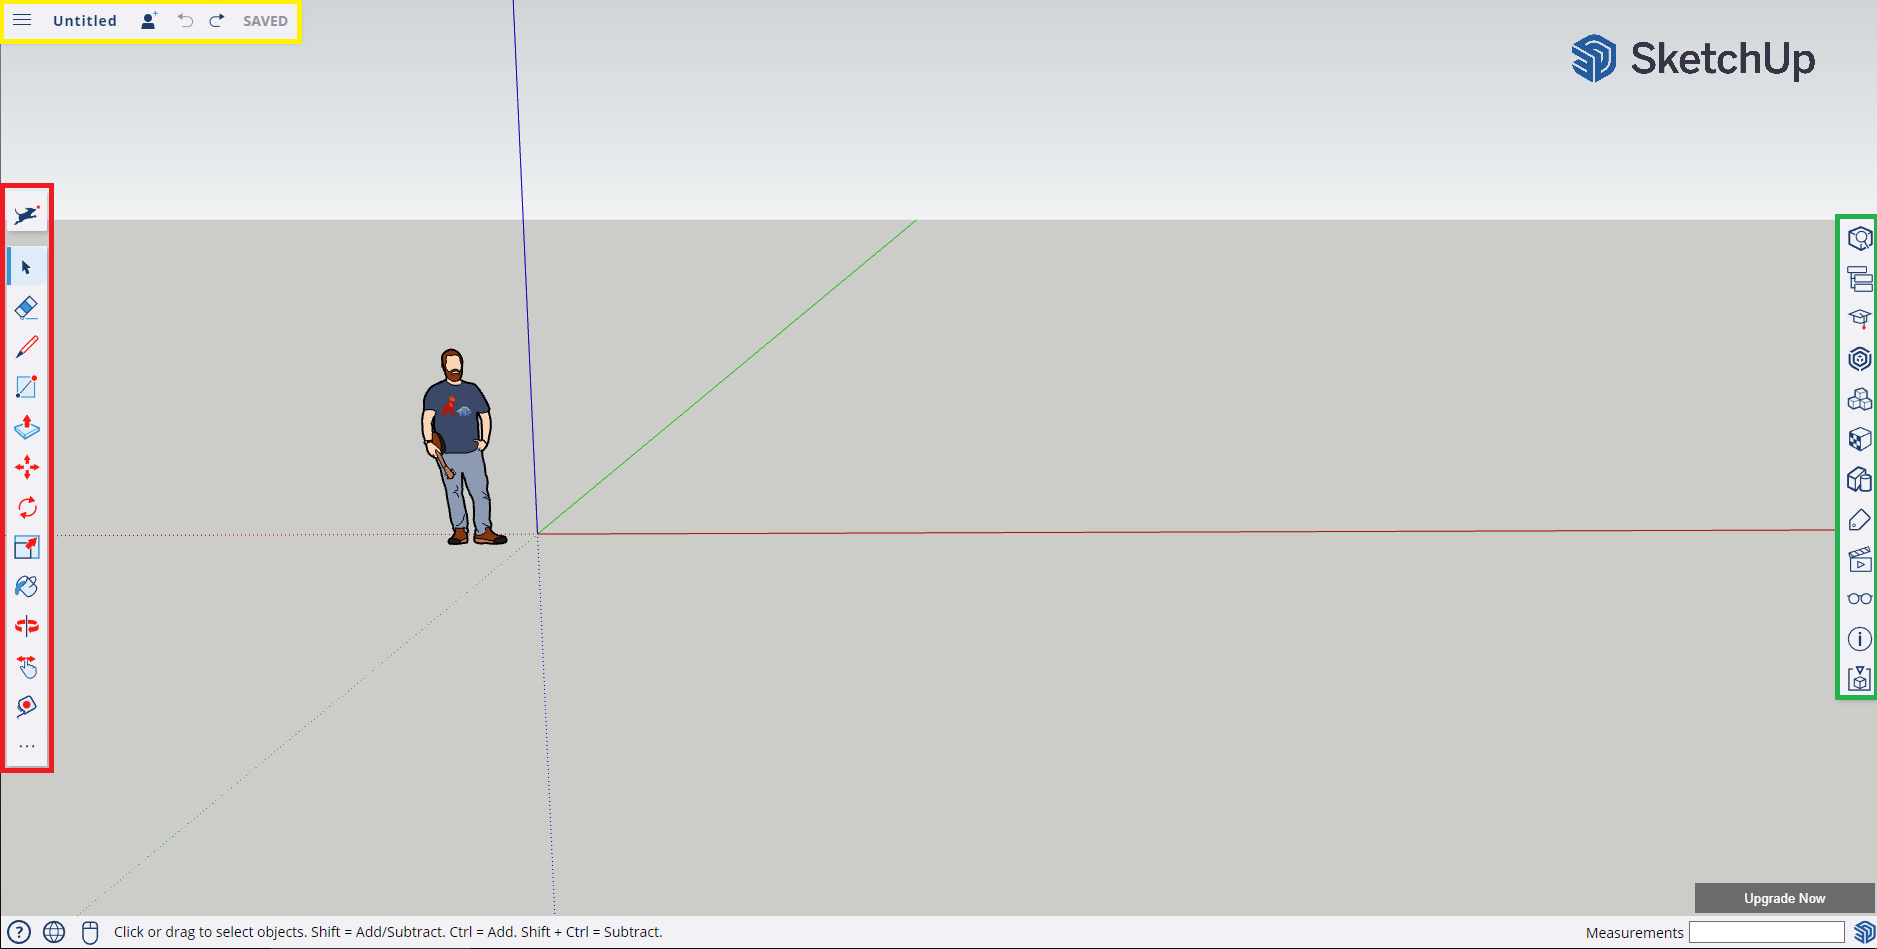
1. Interface
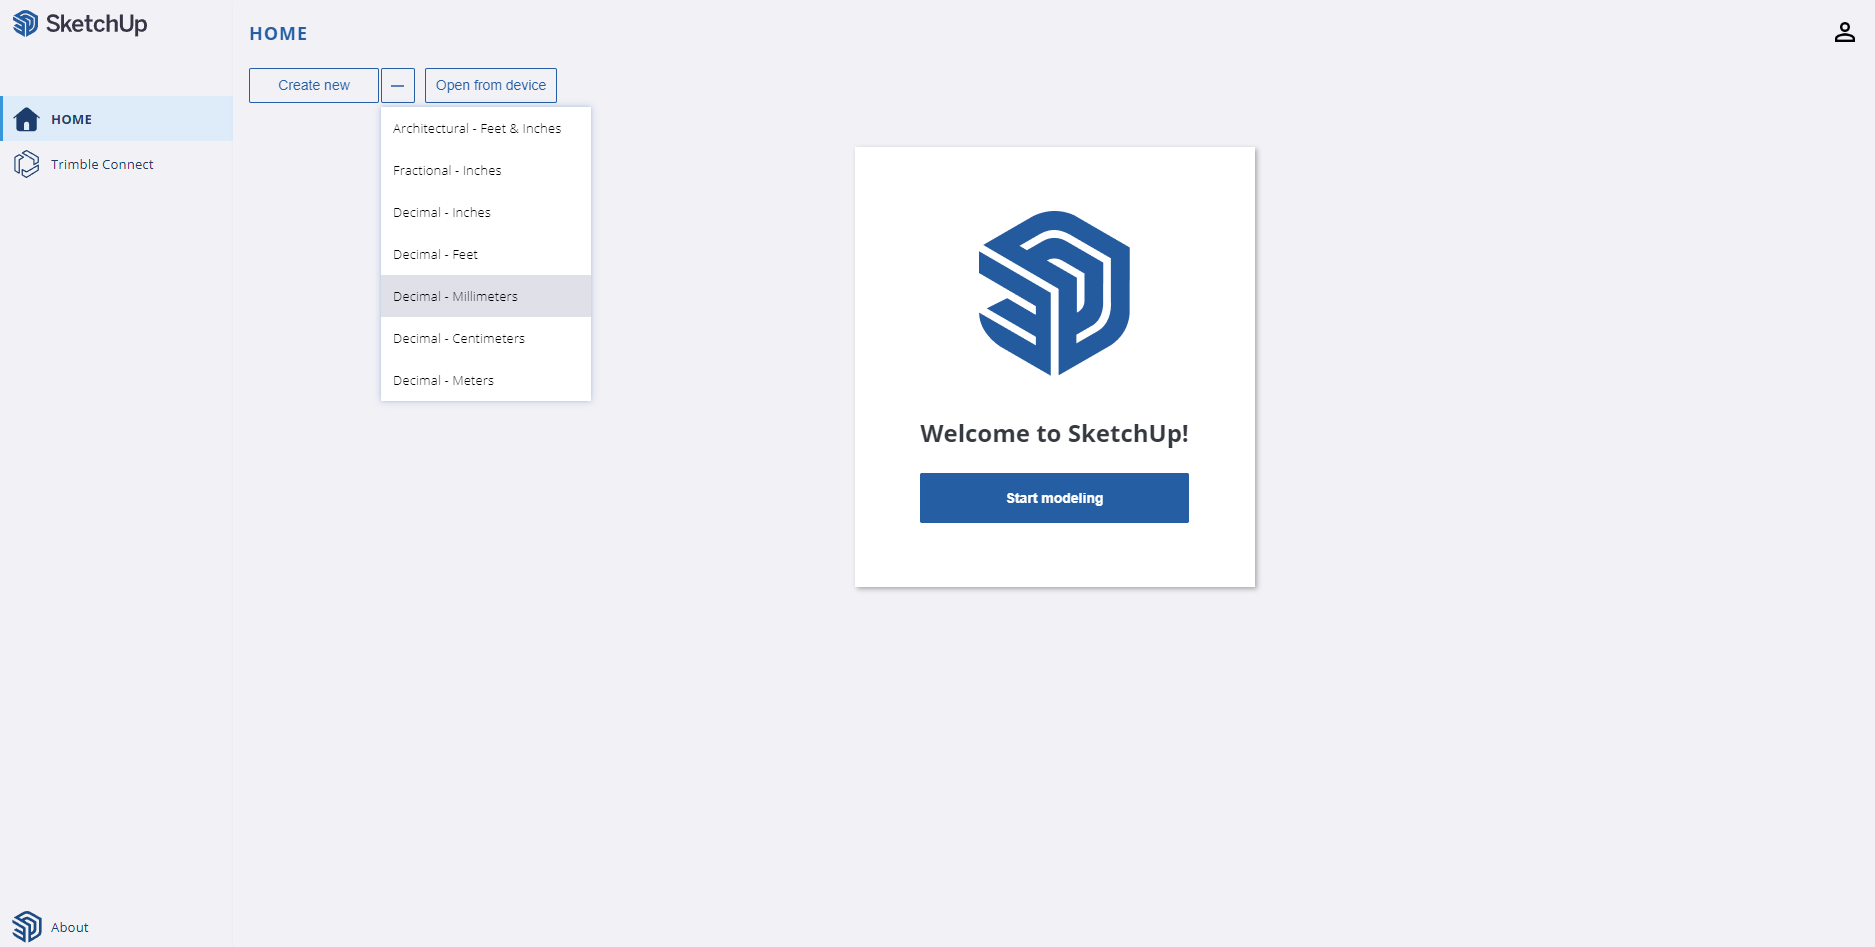
It's important to correctly select the units in which our objects will be displayed (inches, feet, centimeters, millimeters, etc.).