Blender - modeling - step by step - advanced
In this chapter we will look at more advanced modeling.
2. Editing and movement of the character
In this chapter, we will show how to "smooth out" our character. We will use the "Subdivision Surface" modifier for this purpose.
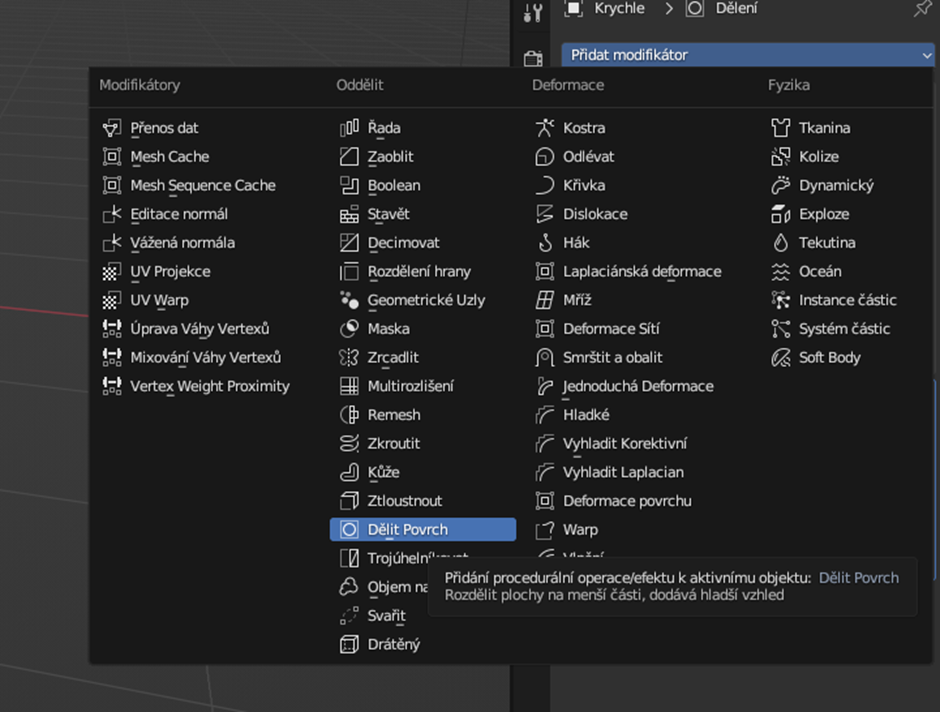
The entire surface of our character will be divided into smaller parts, making the character appear more natural.

The number of subdivisions can be adjusted - the more divisions, the smoother the surface will be.
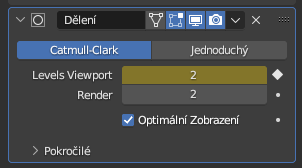
If we set the Level Viewport to 2, our character's surface will be twice as smooth.

NOTE: If our character disappears after adding the modifier, we need to turn off GPU Subdivision!
Edit -> Preferences -> Display -> Subdivision -> GPU Subdivision


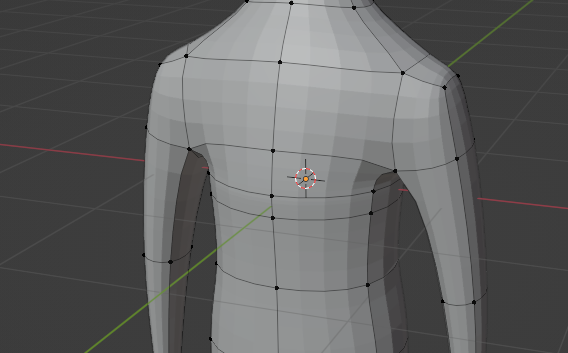
When we switch to Edit mode, we can see that the new surface doesn't align perfectly with the outline/vertices.

To make the outline align properly, we'll enable the "Shrinkwrap" function.
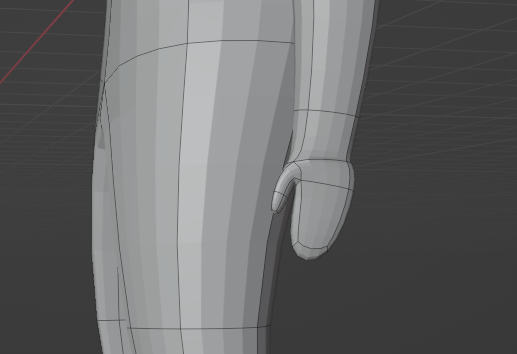
We can adjust the proportions of the character according to preferences - for example, resize knees or the torso, work with shoulders or the neck, or even model simple fingers to add dynamism.
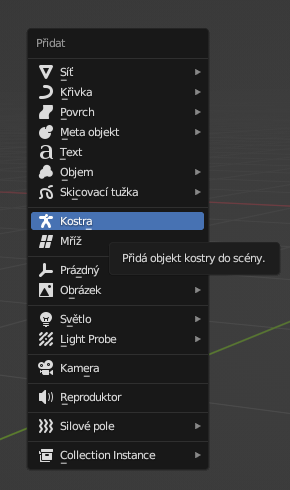
We can also add a skeleton to our character to allow for movement. Press Shift+A and add an Armature.

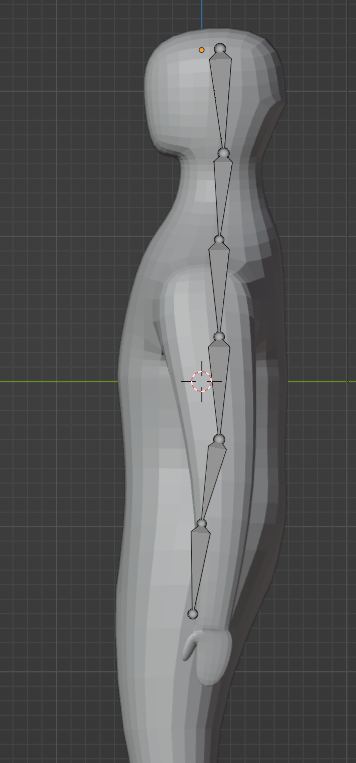
Now we can see the bone within the character. Place it at the top, rotate it by 90°, and then extend it using the "E" key to create the spine.
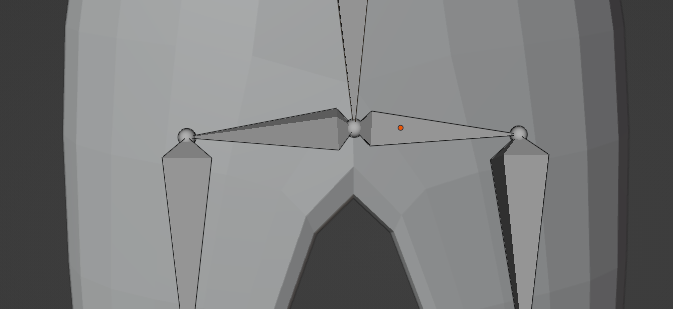
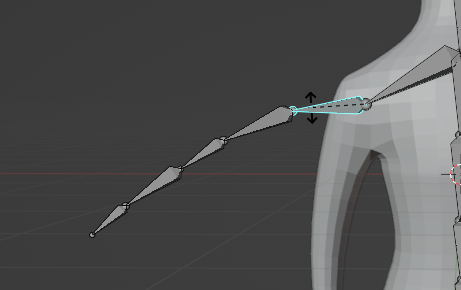
Switch to a front view and add bones to one of the legs.

Then duplicate the leg and mirror it along the X-axis.

Click on the first bone in the leg, then hold Shift and click the last bone in the spine. Press Ctrl+P and select "Connected", which will link the selected bones.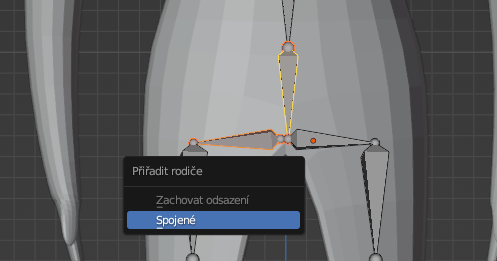
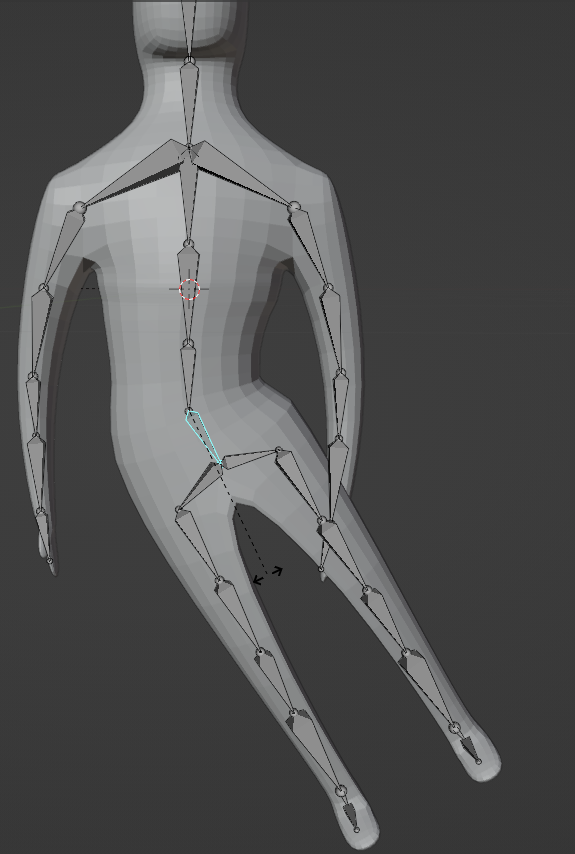
Adjust the bones to a more natural position. Follow the same process for the character's arms.

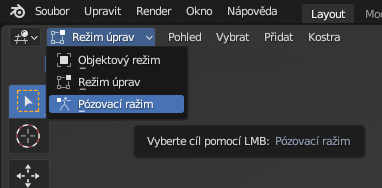
To move the bones, we need to switch to pose mode.
Keep in mind that all connected bones will move together!
As we can see, only the bones are moving, not the character itself. Just as we connected individual bones, we need to link our character to the armature. Switch to Object mode, select the character, then hold Shift and select the armature. Press Ctrl+P and select "With Automatic Weights".

After this, we can move the armature freely (remember to switch to pose mode). If we have connected the bones and character correctly, moving any bone will also move the character accordingly..
The entire surface of our character will be divided into smaller parts, making the character appear more natural.
The number of subdivisions can be adjusted - the more divisions, the smoother the surface will be.
If we set the Level Viewport to 2, our character's surface will be twice as smooth.
NOTE: If our character disappears after adding the modifier, we need to turn off GPU Subdivision!
Edit -> Preferences -> Display -> Subdivision -> GPU Subdivision
When we switch to Edit mode, we can see that the new surface doesn't align perfectly with the outline/vertices.
To make the outline align properly, we'll enable the "Shrinkwrap" function.
We can adjust the proportions of the character according to preferences - for example, resize knees or the torso, work with shoulders or the neck, or even model simple fingers to add dynamism.
We can also add a skeleton to our character to allow for movement. Press Shift+A and add an Armature.
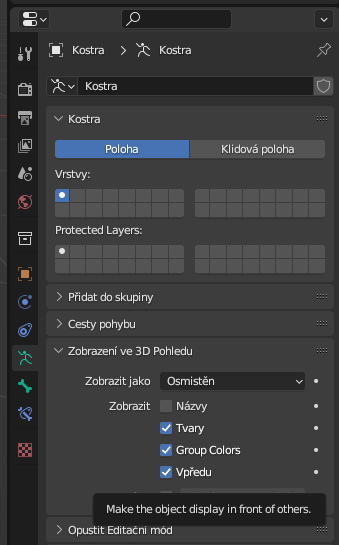
The armature is currently located in the center of the modeling area and is not visible. Click on the object properties and check the "In Front" box.
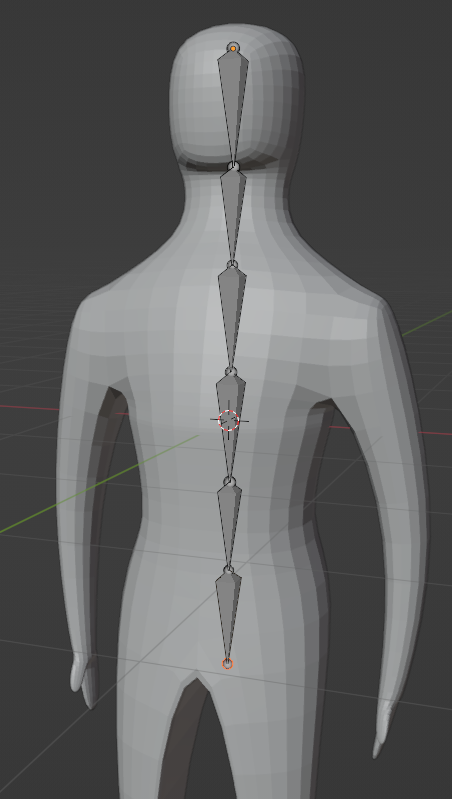
Now we can see the bone within the character. Place it at the top, rotate it by 90°, and then extend it using the "E" key to create the spine.
Adjust the spine to a more natural shape.
Switch to a front view and add bones to one of the legs.
Then duplicate the leg and mirror it along the X-axis.
Click on the first bone in the leg, then hold Shift and click the last bone in the spine. Press Ctrl+P and select "Connected", which will link the selected bones.
Adjust the bones to a more natural position. Follow the same process for the character's arms.
To move the bones, we need to switch to pose mode.
Keep in mind that all connected bones will move together!
As we can see, only the bones are moving, not the character itself. Just as we connected individual bones, we need to link our character to the armature. Switch to Object mode, select the character, then hold Shift and select the armature. Press Ctrl+P and select "With Automatic Weights".
After this, we can move the armature freely (remember to switch to pose mode). If we have connected the bones and character correctly, moving any bone will also move the character accordingly..